¶ Software Installation
¶ 1. Install "arm-none-eabi toolchain 10.x 2021.10"

Download from Wiki
Developer Website
Default installation path: C:\Program Files (x86)\GNU Arm Embedded Toolchain\10 2021.10
¶ 2. Install "CMake"

Download from Wiki
Developer Website
Default installation path: C:\Program Files\CMake
Checking the
Add CMake to the PATH environment variableoption is not required.
¶ 3. Download the "Ninja" Build System

Download from Wiki
Developer Website
Extract the archive to: C:\ninja
¶ 4. Install "VS Code"

¶ 5. Extract the Project

Extract the archive to: C:\ntc
The resulting file structure should look like this:
Show file tree
C:\
└ ntc
   ├ ntc-user-app                      - Project template folder
   │  ├ .vscode
   │  │   ├ tasks.json                 - Build and firmware upload tasks
   │  │   ├ settings.json              - Local VS Code settings
   │  │   ├ extensions.json            - List of required VS Code extensions
   │  │   └ launch.json                - Debug configuration
   │  ├ cmake
   │  │   └ gcc-arm-none-eabi.cmake    - Toolchain configuration file
   │  ├ ntc_api                        - Static library providing access to device peripherals
   │  │  ├ inc
   │  │  │  └ ...                      - Static library header files
   │  │  └ lib
   │  │     └ libntc_api.a
   │  ├ ntc_linker_script.ld           - Linker script
   │  ├ main.c                         - Main source file containing user firmware
   │  ├ CMakePresets.json              - CMake presets for VS Code
   │  ├ app.cmake                      - Project configuration variables
   │  └ CMakeLists.txt                 - Main CMake project file
   │
   └ ntc-file-loader                   - Firmware upload utility
      ├ ntc_file_loader.exe            - Firmware upload application
      └ ...
¶ Getting Started
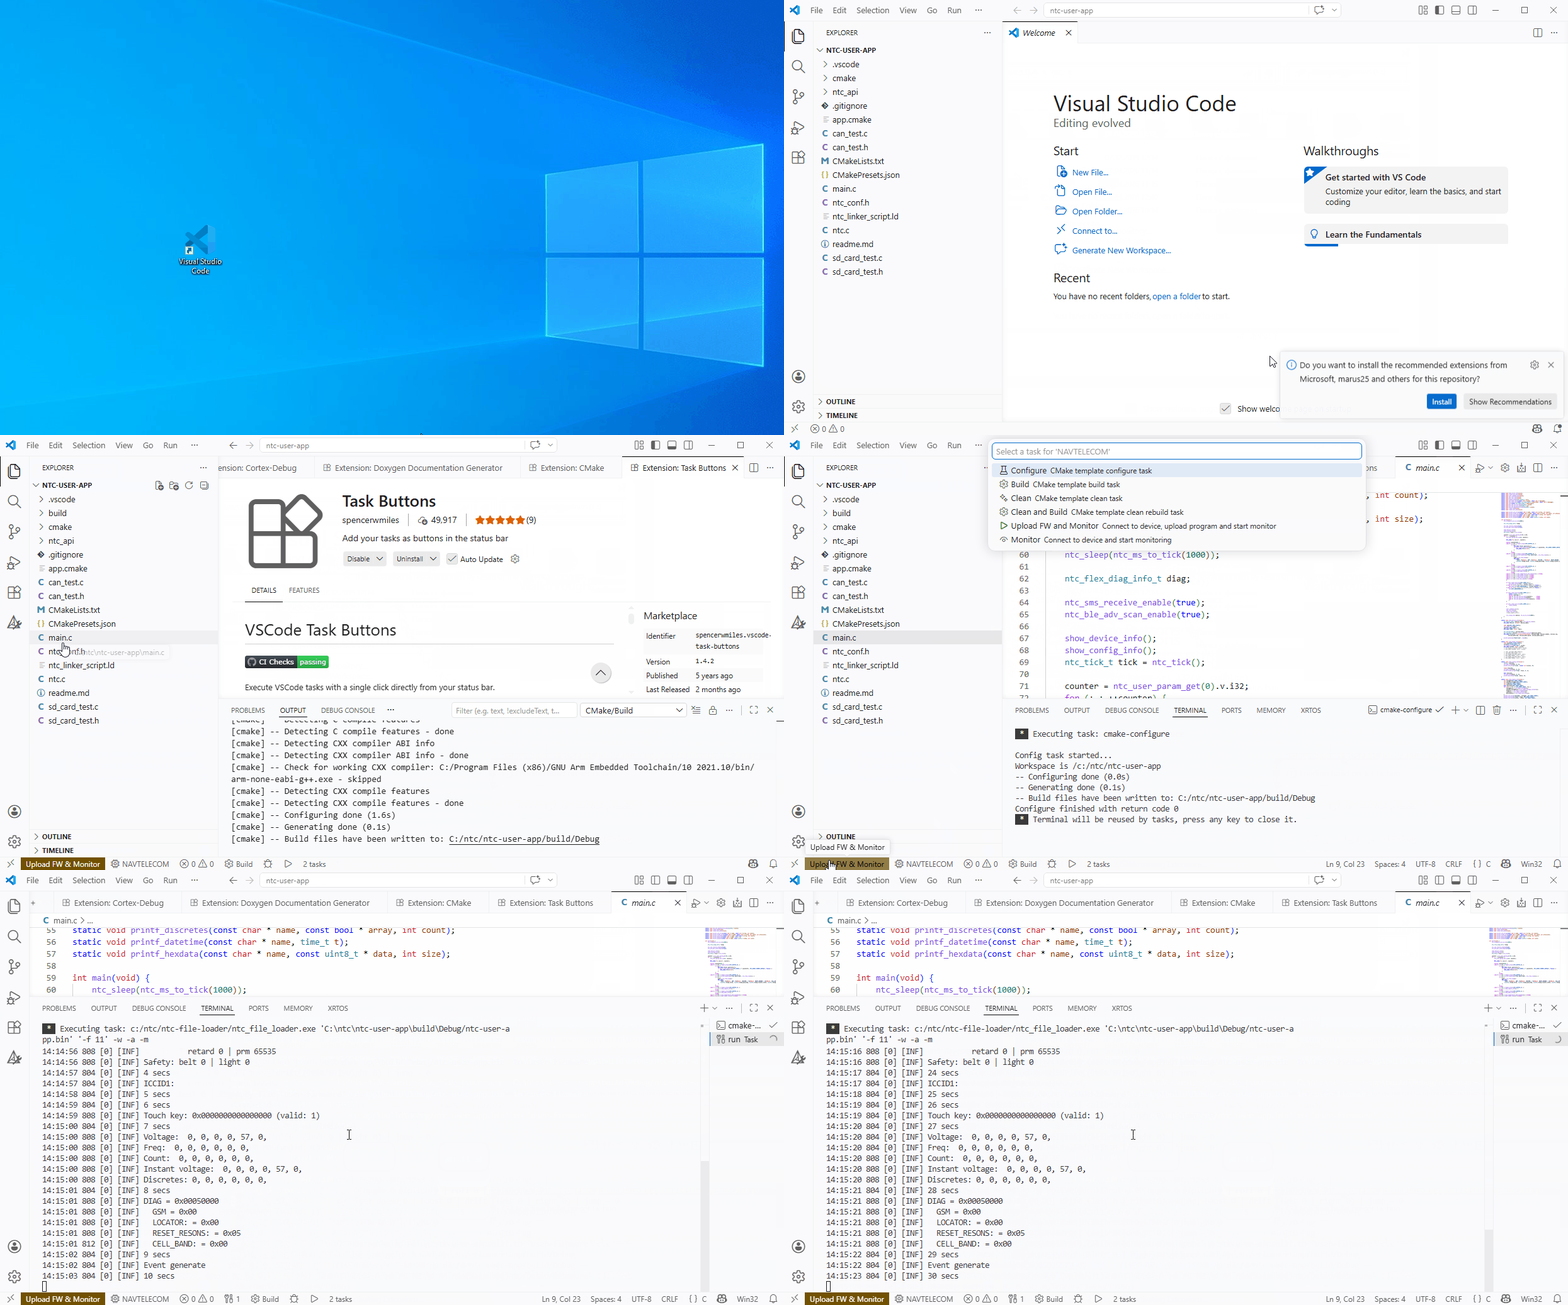
The initial VS Code setup process is described below both as a step-by-step guide and as an animated demonstration.
Show animation
¶ 1. Open the Project in VS Code
Open the project folder:
File ➜ Open Folder... ➜ C:\ntc\ntc-user-app
If VS Code asks whether you trust the authors of this project, select Yes.
¶ 2. Install Extensions
(This step only needs to be completed once after installation.)
A prompt to install the recommended extensions will appear in the lower-right corner of the screen. Accept the installation and wait until it completes.
Show extension list
Required:
| Name | Description |
|---|---|
ms-vscode.cpptools |
C and C++ development tools |
ms-vscode.cmake-tools |
Tools for working with the CMake build system |
twxs.cmake |
CMake syntax highlighting |
Recommended:
| Name | Description |
|---|---|
spencerwmiles.vscode-task-buttons |
Provides convenient access to VS Code tasks |
cschlosser.doxdocgen |
Automatically generates comments in Doxygen format |
marus25.cortex-debug |
ARM Cortex-M debugging support (requires a J-Link programmer for debugging) |
¶ Project Controls
After installing the spencerwmiles.vscode-task-buttons extension, the following buttons will appear in the lower-left corner of VS Code:
- Upload FW & Monitor (Build the project, upload the firmware to the device, and open the log terminal)
- NAVTELECOM (Full list of available project actions)
¶ 3. Configure the Project
(This step only needs to be completed once after installation.)
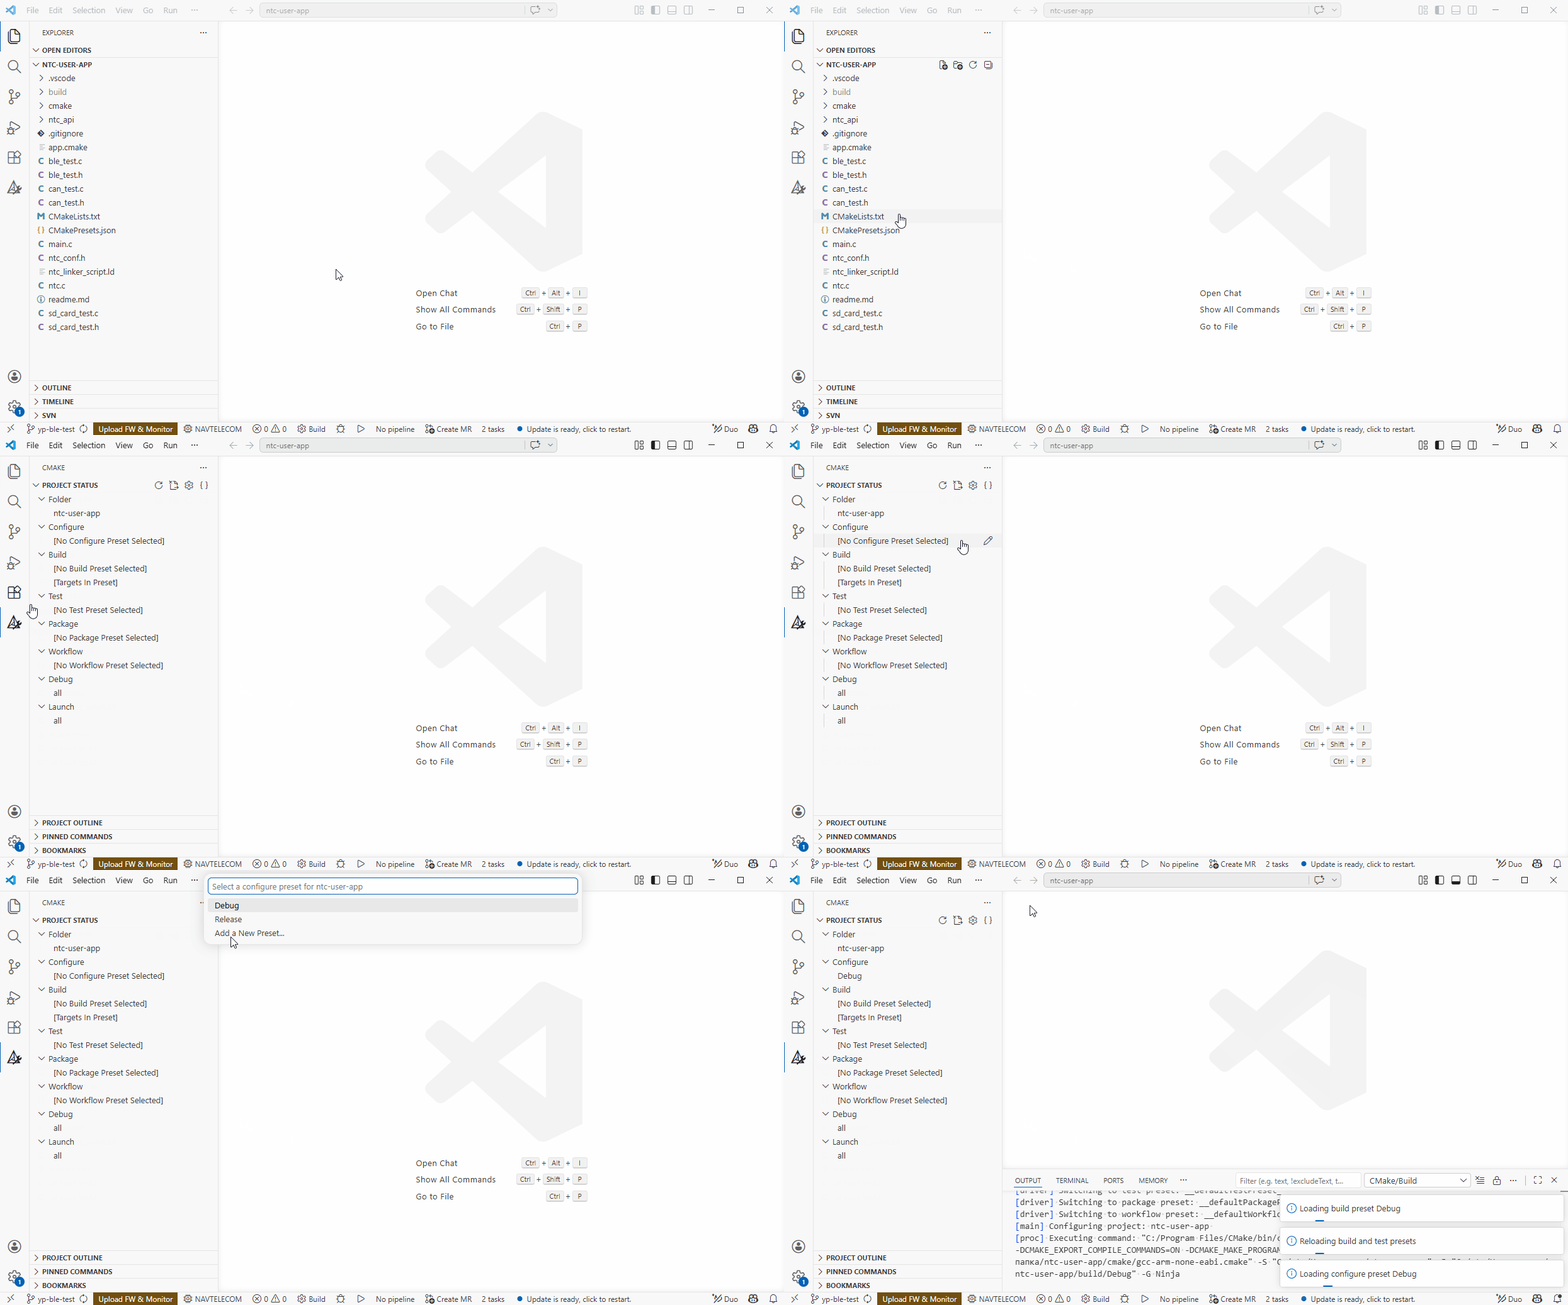
- In the left sidebar, open the CMake section (icon
 )
) - In the Configure group, click Configure preset (icon
 )
) - A build configuration selector will appear at the top of the window. Select
Debug.
Show animation
¶ 4. Prepare the Device
The feature is currently in open testing and is available for the following devices: S-453x, S-4751, S-4753:
Download test firmware
-
Connect the device to a computer and use NTC Configurator to upload firmware with CE Code support.
If necessary, install the drivers
-
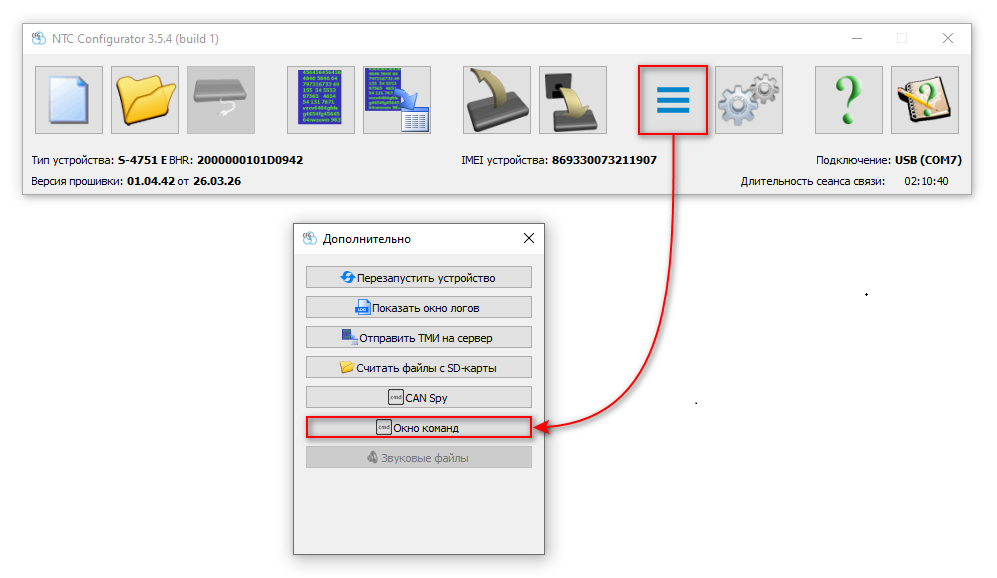
Enable the CE Code feature using the following command:
*!EDITS CMPLXEVNTS:CODE(1)Sending a command from the Configurator
-
After completing the configuration, close the NTC Configurator application.
(This is required so that VS Code can connect to the device.)
¶ 5. Build and Upload the Program
Switch back to VS Code.
Click Upload FW & Monitor in the lower-left corner. The execution results will be displayed in the console.
The editor will perform the following steps sequentially:
-
Build— Validate and compile the project. -
Upload— Connect to the device and upload the compiled firmware binary.(The device will automatically reboot after the firmware upload is complete.)
-
Monitor— Once the device starts up, Complex Events logs will be streamed to the VS Code terminal.To stop log output, press CTRL+C in the terminal.